Monday, April 6, 2009

Final Proposal and Image Examples

Natalie Hammers
Photo Final Proposal
Up Close & Personal
The purpose of this series is to magnify simple everyday objects that inhibit our bathroom medicine cabinets. A documentary of still life images, mostly “macro” such as Chapstick, tweezers, nail clippers, make up, jewelry, prescription pills and anything else I can find.
I would probably use 400 speed film because I do not yet have a tripod and I’m afraid to use any other speed for the time being. Other technical considerations would be that I do not have a tripod to stay still enough in the bathroom, which I expect to have very low light.
To display this series, I would love to mount it on hexagonal boards that reflect the tiles in my bathroom, and then connect them like a honeycomb, but I think that would take away from the images. It would also be interesting to mount them, and then display them with some kind of tape…maybe like that medical tape that comes with gauze that’s found under the sink. The tape would be small rough strips diagonal to the corners. I’ll probably display it in a square, four by two- or in a straight line.
Questions:
1. As a display, are these pictures boring?
2. Do these images represent things you would find in a bathroom?


Final Proposal

Here is a copy of what is expected of you for Wednesday 4-08-09


Tuesday, February 17, 2009

MAN RAY
Emmanuel Radnitzky (August 27, 1890 – November 18, 1976)

Emmanuel Radnitzky & Salvador Dali

Man Ray, born Emmanuel Radnitzky (August 27, 1890 – November 18, 1976), was an American artist who spent most of his career in Paris, France. Perhaps best described simply as a modernist, he was a significant contributor to both the Dada and Surrealist movements, although his ties to each were informal. Best known in the art world for his avant-garde photography, Man Ray produced major works in a variety of media and considered himself a painter above all. He was also a renowned fashion and portrait photographer.


Man Ray, Le Violon d'Ingres, 1924
Epreuve gélatino-argentique montée sur papier


RAY-0-GRAMS
The technology of photography was one of the favorite media of the Dada artist Man Ray; his inventive technique of placing objects on light-sensitized paper as in his Rayogram, (1922), showed the abstract possibilities of photograph. He was always exploring new mechanical ideas and "his crisp and ethereal photographs and maliciously witty objects were a revelation" (Gale 197).

"When I saw I was under attack from all sides, I knew I was on the right track."
-Man Ray

“I do not photograph nature. I photograph my visions.”
–Man Ray


A creator needs only one enthusiast to justify him
–Man Ray


An original is a creation motivated by desire. Any reproduction of an originals motivated be necessity. It is marvelous that we are the only species that creates gratuitous forms. To create is divine, to reproduce is human.
–Man Ray


All critics should be assassinated.
–Man Ray

Don't put my name on it. These are simply documents I make.
–Man Ray


I paint what cannot be photographed, that which comes from the imagination or from dreams, or from an unconscious drive.
–Man Ray

I photograph the things that I do not wish to paint, the things which already have an existence. -Man Ray

It has never been my object to record my dreams, just the determination to realize them.
-Man Ray

Of course, there will always be those who look only at technique, who ask 'how', while others of a more curious nature will ask 'why'. Personally, I have always preferred inspiration to information.
-Man Ray

One of the satisfactions of a genius is his will-power and obstinacy.
-Man Ray

To me, a painter, if not the most useful, is the least harmful member of our society.
-Man Ray

RAY-O-
WANNABEES
but still pretty cool....


Sunday, February 15, 2009

QUALITY of LIGHT

Quality of Light

Equipment Needed: Camera, minimum of 1 roll of 36 exposure ISO 400 film

Make the quality of light the subject of your photographs. Look for patterns of light and situations where you are more aware of the light than the actual object or scene.
Remember that the presence of strong light often means that there will be heavy or strong shadows. Experiment with at least 10 – 15 frames making images where you are not sure if the photograph will emphasize the shadows or the light casting the shadows.

Make sure to Bracket!!!
Do not use flash or strobe for this assignment!
Use only ambient/available light (this includes sun, lamps, overhead lights, etc..)


Some lighting conditions to consider:

reflected/absorbed soft/harsh

bright/diffused dawn/dusk


hard light with distinct shadows


soft – subtle, diffused light


artificial: florescent and mercury vapor light


overcast or open shade in direct sun


bright or intense


absorbed or obstructed


dawn - dusk - midday

The color, direction, quantity, and quality of the light you use determines how your subjects appear. When shooting outdoors, the direction of light changes as the sun moves across the sky. The shape and direction of shadows are altered. Direction of sunlight greatly affect the appearance of a scene. The quality of sunlight depends on its strength and position. Strong, direct sunlight is "hard" because it produces dark, well-defined shadows and brilliant highlights. Sunlight is hardest on clear summer days at noon. Sunlight can be diffused by clouds, fog, haze, mist, or pollution in the air. This diffused light is softer; it produces gentle, soft shadows and dull highlights. Interesting effects can be achieved by changing the angle of the light. As you turn your subject, change the camera viewpoint, or wait for the sun to move, the light falls more on one side, and more shadows are cast on the opposite side of the subject.
more information on quality of light:
http://www.ted.photographer.org.uk/photoscience_lighting.htm
http://pages.cthome.net/rwinkler/light.htm

SHUTTER SPEEDS AND APERTURES

Aperture


F-stops
f1 f1.4 f2 f2.8 f4 f5.6 f8 f11 f16 f22 f32 f64

All cameras, whether an ancient film camera, or a more modern digital, work in pretty much the same way. Photographs are taken by letting light fall onto a light-sensitive medium, which records the image.
The aperture controls the amount of light that reaches a light sensitive medium, wither it be digitally, film, or paper. The aperture controls the intensity at which light will strike the film. An aperture acts much like the pupil of an eye that opens larger as light decreases to let in more available light. The pupil shrinks when light increases to reduce the amount of light entering the eye.
Put simply, a camera consists of a light-tight box or even film canister, that stores a light-sensitive device, a lens that magnifies and focuses the image onto that light-sensitive device through a hole in the box (called the aperture), and a shutter that opens and closes when you press the shutter release, exposing the film to the light; this is why a picture is sometimes called an exposure.
The amount of light entering the camera depends on the amount of light in the scenes that you’re photographing. A bright sunny cloudless day has more available light than a cloudy one, which in turn has more light than an indoor scene lit by tungsten lighting. To make the picture look right, we have to expose the film to the right amount of light. Too short, and the image will be light, or underexposed. Too long, and the image will be dark, or overexposed.
The combination of aperture and shutter speed are related, and effect the exposure value. The faster the shutter speed, the larger the opening of the lens and visa versa. Aperture and shutter speed have to come together in balance based on a given lighting scenario to make the proper exposure.

The diameter of an aperture is measured in f-stops. A lower f-stop number opens the aperture and admits more light onto the camera. Higher f-stop numbers make the camera's aperture smaller so less light hits the film.
When an aperture is opened up by one f- stop, the amount of light which reaches the film is doubled.
Aperture settings can be used creatively to control depth of field, how much of a photo is sharp in front and back of where you focus on the main subject. The technique is useful for close-up and portrait shots.

Shutter speed

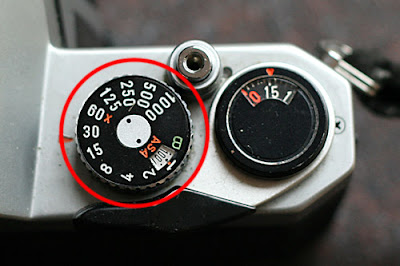
B 1 2 4 8 15 30 60 125 250 500 1000 2000 4000
The concept of shutter speed isn’t too hard to understand. The longer you leave the shutter open, the more light that strikes the film, resulting in a darker image.
Shutter speeds are measured in fractions of a second, and is the time taken from when the shutter opens to when the shutter closes, after you’ve press the shutter. Moving from one speed to the next either halves the amount of light that can enter the camera or doubles it. The change from one speed to another (and halving or doubling the light that enters the camera) is called moving a stop. What affect does changing shutter speed have on your final image? As well as controlling the amount of light that enters the camera, shutter speed effects motion and blur. While fast shutter speeds can “freeze” motion, slower shutter speeds extend activity or blur moving objects.

EXAMPLES:

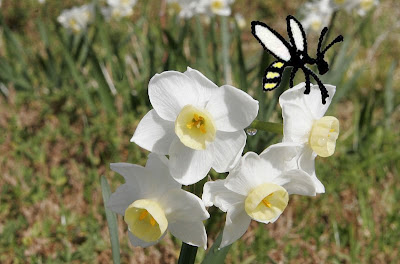
Lots of bees - Slow shutter speed - Large aperture -
Shallow depth of field

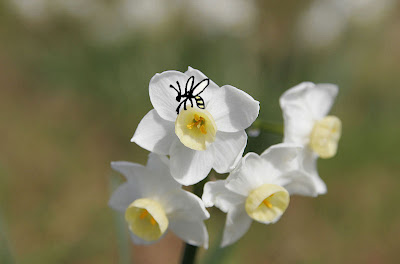
Not so many bees - Slow shutter speed- Blurry queen

Wingless queen - Fast Shutter speed - Stopping action of the waggle dance

One blurry bee - Slow shutter speed

Sharp bee - Fast shutter speed

Large bee - Small aperture -Plenty depth of field

Small bee - Large aperture - Shallow depth of field

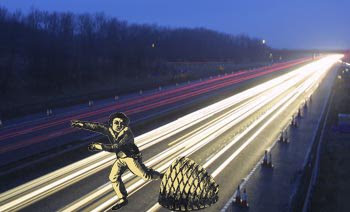
Don't play with bees in traffic - Long exposure - Bad idea